Unlock The Secrets: Transform Your Popcorn Ceiling Today!
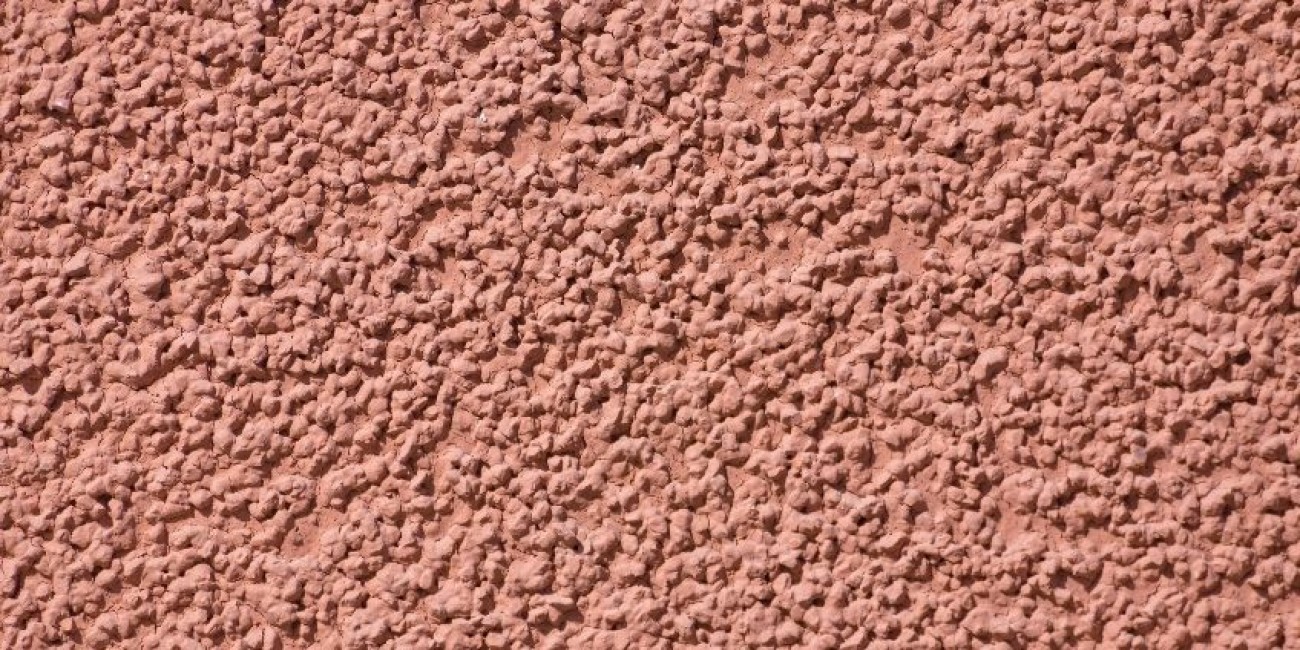
Popcorn ceilings, a prevalent feature in older homes, are characterized by their rough, textured surface. While they can provide sound insulation and hide imperfections, popcorn ceilings can also accumulate dust and become outdated. Painting popcorn ceilings can transform their appearance, enhance the overall aesthetic of a room, and increase its perceived value.
Before embarking on a popcorn ceiling painting project, it's crucial to understand the benefits and potential drawbacks. Painting popcorn ceilings can improve the lighting in a room by reflecting light more evenly, making it feel brighter and more spacious. Additionally, a fresh coat of paint can conceal stains, discoloration, and other imperfections, restoring the ceiling to its former glory. However, it's important to note that painting popcorn ceilings can be a time-consuming and labor-intensive process, and it may require multiple coats to achieve desired results. Furthermore, the rough surface of popcorn ceilings can make it difficult to achieve a perfectly smooth finish.
In this comprehensive guide, we will delve into the step-by-step process of painting popcorn ceilings, providing detailed instructions and helpful tips to ensure a successful outcome. We will cover essential aspects such as surface preparation, paint selection, application techniques, and troubleshooting common challenges. By following these guidelines, you can transform your popcorn ceiling into a smooth, modern surface that complements your home's dcor.
How to Paint Popcorn Ceilings
Transforming a popcorn ceiling into a smooth, modern surface requires careful consideration of several key aspects:
- Surface Preparation: Cleaning and repairing the ceiling ensures a smooth base for painting.
- Paint Selection: Choosing the right paint type and finish is crucial for durability and aesthetics.
- Application Techniques: Using proper techniques, tools, and safety gear is essential for efficient painting.
- Multiple Coats: Applying multiple thin coats ensures even coverage and a professional finish.
- Drying Time: Allowing ample drying time between coats prevents peeling and ensures adhesion.
- Lighting: Good lighting is important for visibility and achieving an even finish.
- Safety Precautions: Wearing a mask and goggles protects against dust and fumes.
- Patience and Time: Popcorn ceiling painting can be time-consuming, so patience is key.
- Texture Considerations: The popcorn texture may affect paint absorption and the final appearance.
- Professional Assistance: For complex or large popcorn ceilings, consider hiring a professional.
By understanding these key aspects, you can approach popcorn ceiling painting with confidence and achieve a successful outcome. Remember that proper preparation, careful paint selection, and precise application techniques are essential for a smooth, durable, and aesthetically pleasing finish.
Surface Preparation
Surface preparation is a crucial step in painting any ceiling, but it is especially important when painting popcorn ceilings. The rough, textured surface of popcorn ceilings can make it difficult for paint to adhere properly, leading to peeling and flaking. By cleaning and repairing the ceiling before painting, you can create a smooth, even surface that will help the paint to adhere better and last longer.
To clean a popcorn ceiling, you will need to use a vacuum cleaner with a soft brush attachment to remove any dust or debris. You can also use a damp sponge or cloth to wipe down the ceiling, but be sure to wring it out well so that you don't add too much moisture to the ceiling. Once the ceiling is clean, you will need to repair any cracks or holes. You can do this by using a spackling paste or a joint compound. Once the repairs are dry, you can sand them smooth so that they are flush with the rest of the ceiling.
By taking the time to properly prepare the surface of your popcorn ceiling, you can ensure that your paint job will be successful. A smooth, even surface will help the paint to adhere better and last longer, giving you a beautiful, professional-looking finish.
Paint Selection
When painting a popcorn ceiling, the type of paint you use will have a significant impact on the durability and aesthetics of the finished product. Flat paint is a good choice for popcorn ceilings because it will help to hide the texture of the ceiling and create a smooth, even finish. Eggshell or satin paint can also be used, but they may not hide the texture of the ceiling as well as flat paint. Semi-gloss or gloss paint is not recommended for popcorn ceilings because it will reflect light and make the texture of the ceiling more noticeable.
- Durability: The durability of the paint will determine how well it resists chipping, peeling, and fading. For popcorn ceilings, a paint with a high durability rating is important, as the rough texture of the ceiling can be more abrasive than smooth surfaces.
- Aesthetics: The finish of the paint will affect the appearance of the popcorn ceiling. Flat paint will create a matte finish, while eggshell or satin paint will create a slight sheen. Semi-gloss or gloss paint will create a more reflective finish.
- Coverage: The coverage of the paint will determine how many coats you need to apply to achieve the desired finish. Popcorn ceilings can be more difficult to cover than smooth ceilings, so it is important to choose a paint with good coverage.
By understanding the different types of paint and finishes available, you can choose the right paint for your popcorn ceiling and achieve the desired results.
Application Techniques
When painting a popcorn ceiling, using the proper techniques, tools, and safety gear is essential for achieving a professional-looking finish while protecting yourself from potential hazards. Here are some key considerations:
- Tools: Using the right tools for the job will make painting your popcorn ceiling much easier and more efficient. A paint sprayer is the best tool for painting popcorn ceilings, as it will allow you to apply the paint evenly and quickly. If you do not have a paint sprayer, you can use a brush or roller, but it will take longer and may not produce as even a finish.
- Techniques: When painting a popcorn ceiling, it is important to use the proper techniques to avoid drips and splatters. Start by painting the edges of the ceiling first, then work your way inward. Use a light, even stroke and avoid overapplying the paint. If you are using a brush or roller, be sure to overlap your strokes to ensure even coverage.
- Safety: Painting a popcorn ceiling can create a lot of dust, so it is important to wear a mask and goggles to protect yourself from inhaling the dust. You should also open windows or doors to ventilate the area while you are painting.
By following these tips, you can ensure that your popcorn ceiling painting project is a success. Using the proper techniques, tools, and safety gear will help you achieve a professional-looking finish while protecting yourself from potential hazards.
Multiple Coats
Applying multiple thin coats of paint is a crucial aspect of achieving a professional-looking finish on a popcorn ceiling. This technique allows the paint to penetrate the popcorn texture evenly, resulting in a smooth, consistent surface. By avoiding thick, single coats, you minimize the risk of drips, runs, and uneven drying, which can compromise the overall aesthetic of the ceiling.
- Coverage and Consistency: Multiple thin coats ensure that the paint is evenly distributed across the popcorn texture, filling in any gaps or crevices. This results in a uniform coverage, eliminating the appearance of missed spots or variations in color.
- Texture Preservation: Applying thin coats allows the popcorn texture to remain intact, avoiding the flattening or smoothing out of the surface. This preserves the unique character and sound-absorbing properties of the popcorn ceiling.
- Durability and Longevity: Multiple coats provide increased durability and longevity to the painted surface. Each thin layer contributes to the overall strength and adhesion of the paint, making it more resistant to wear, fading, and peeling over time.
- Professional Appearance: A well-executed multi-coat application results in a smooth, professional-looking finish that enhances the overall appearance of the room. It creates a clean, cohesive surface that complements any dcor or lighting.
In conclusion, applying multiple thin coats is an essential technique for painting a popcorn ceiling. By following this approach, you can achieve a uniform, durable, and aesthetically pleasing finish that preserves the popcorn texture and elevates the overall ambiance of the space.
Drying Time
Drying time is a crucial aspect of the popcorn ceiling painting process, directly impacting the integrity and longevity of the finished surface. Understanding the significance of drying time and implementing proper waiting periods between coats is essential for successful popcorn ceiling painting.
- Peel Resistance: Ample drying time allows each coat of paint to fully adhere to the surface before the next coat is applied. Sufficient drying prevents premature peeling or flaking of the paint, ensuring a durable and lasting finish.
- Bond Strength: When each coat of paint is given adequate time to dry, the chemical bonds between the paint and the popcorn texture strengthen, resulting in a stronger overall adhesion. This enhanced bond prevents the paint from detaching from the ceiling, even under stress or temperature changes.
- Smooth Finish: Allowing each coat to dry completely eliminates the risk of applying a new coat over wet paint, which can lead to unevenness, brushstrokes, or a rough texture. Proper drying time promotes a smooth, professional-looking finish that enhances the visual appeal of the ceiling.
- Moisture Prevention: Popcorn ceilings are prone to moisture absorption due to their porous nature. Allowing ample drying time between coats helps to prevent moisture from becoming trapped beneath the paint layers, reducing the likelihood of blistering, cracking, or peeling caused by trapped moisture.
In summary, adhering to proper drying times between coats is not merely a recommendation but a crucial step in achieving a durable, aesthetically pleasing, and long-lasting painted popcorn ceiling. By allowing each coat to dry completely, homeowners can ensure a strong bond, a smooth finish, and protection against moisture-related issues.
Lighting
When painting a popcorn ceiling, proper lighting is essential for ensuring both visibility and an even finish. The rough texture of popcorn ceilings can make it difficult to see where you are painting, leading to missed spots or uneven paint application. Additionally, good lighting helps to highlight any imperfections in the ceiling, such as bumps or cracks, so that you can address them before painting.
- Visibility: Good lighting allows you to see clearly what you are painting, which is especially important when painting a popcorn ceiling. The rough texture of popcorn ceilings can make it difficult to see where you are painting, leading to missed spots or uneven paint application. Good lighting helps to illuminate the surface of the ceiling, making it easier to see where you are painting and to avoid missing any spots.
- Even Finish: Good lighting also helps to achieve an even finish on your popcorn ceiling. When you can see the surface of the ceiling clearly, you can more easily apply the paint evenly and avoid streaks or brush marks. Good lighting helps to highlight any imperfections in the ceiling, such as bumps or cracks, so that you can address them before painting. This will help to create a smooth, even finish on your popcorn ceiling.
By providing good lighting when painting a popcorn ceiling, you can ensure that you are able to see clearly what you are painting and that you are applying the paint evenly. This will help to create a professional-looking finish that will last for years to come.
Safety Precautions
Understanding the connection between "Safety Precautions: Wearing a mask and goggles protects against dust and fumes" and "how to paint popcorn ceiling" is crucial for ensuring a safe and successful painting experience. Popcorn ceilings, due to their rough texture, generate a significant amount of dust and fumes during the painting process. Inhaling these particles can cause respiratory irritation, allergic reactions, or even more severe health issues.
Wearing a mask and goggles serves as a protective barrier against these harmful substances. A mask prevents the inhalation of dust particles, reducing the risk of respiratory problems. Goggles shield the eyes from paint splashes and fumes, protecting against irritation and potential eye damage. By implementing these safety precautions, individuals can minimize the health hazards associated with painting popcorn ceilings.
Furthermore, adhering to safety precautions demonstrates a responsible approach to home improvement. It reflects a commitment to personal well-being and sets a positive example for others. By prioritizing safety, individuals can confidently tackle painting projects, ensuring both a visually appealing ceiling and a healthy environment.
Patience and Time
Painting a popcorn ceiling requires meticulous attention to detail and can be a time-consuming process compared to painting smooth ceilings. The intricate texture of popcorn ceilings demands careful application of multiple paint coats to achieve an even and aesthetically pleasing finish.
The significance of patience and time in popcorn ceiling painting lies in several aspects. Firstly, rushing the process can lead to uneven paint application, missed spots, or an unsatisfactory final outcome. Each coat of paint needs sufficient time to dry before applying the next, ensuring proper adhesion and preventing peeling or flaking. Sufficient drying time also allows the paint to penetrate the popcorn texture thoroughly, resulting in a durable and long-lasting finish.
Furthermore, popcorn ceilings often have imperfections, bumps, or cracks that require additional preparation before painting. Taking the time to address these imperfections by sanding, patching, or applying a primer ensures a smooth and professional-looking surface. Rushing through these preparatory steps can compromise the overall quality of the paint job.
Understanding the time-consuming nature of popcorn ceiling painting helps set realistic expectations and allows for proper planning. Allocating ample time for the project, breaking it down into smaller tasks, and taking breaks when needed can help maintain focus and prevent fatigue. Patience and perseverance are essential virtues for achieving a successful popcorn ceiling painting project.
Texture Considerations
When painting a popcorn ceiling, it is important to consider the texture of the ceiling, as it can affect the absorption of paint and the final appearance of the finished product. Popcorn ceilings have a rough, textured surface that can make it difficult for paint to adhere properly. As a result, it is important to use a paint that is specifically designed for popcorn ceilings and to apply multiple thin coats of paint, allowing each coat to dry completely before applying the next.
The texture of the popcorn ceiling can also affect the final appearance of the painted surface. For example, a flat paint will create a more matte finish, while a semi-gloss or gloss paint will create a more reflective finish. The type of paint that you choose will depend on the desired look that you are trying to achieve.
By understanding the texture of the popcorn ceiling and how it can affect the absorption of paint and the final appearance of the finished product, you can choose the right paint and application techniques to achieve the desired results.
Professional Assistance
Painting a popcorn ceiling can be a challenging task, especially for complex or large ceilings. Hiring a professional painter can provide several benefits and ensure a successful outcome.
- Expertise and Experience: Professional painters have the knowledge, skills, and experience to handle complex popcorn ceiling painting projects. They understand the proper techniques, tools, and materials to achieve a high-quality finish.
- Time and Efficiency: Professional painters can complete the job efficiently, saving you time and effort. They have the necessary equipment and manpower to work quickly and effectively.
- Safety: Popcorn ceiling painting can involve working on ladders or scaffolding, which can be hazardous. Professional painters are trained to work safely and take necessary precautions to prevent accidents.
- Insurance and Warranty: Reputable professional painters are insured and may offer warranties for their work, giving you peace of mind and protection against any issues that may arise.
While hiring a professional may require an additional investment, it can be worthwhile for complex or large popcorn ceiling painting projects. Professional painters can ensure a durable, aesthetically pleasing finish, saving you time, effort, and potential headaches in the long run.
Frequently Asked Questions
Before embarking on a popcorn ceiling painting project, it is helpful to address some common questions and misconceptions.
Question 1: Can I paint over a popcorn ceiling?
Yes, it is possible to paint over a popcorn ceiling. However, proper preparation and paint selection are crucial for a successful outcome.
Question 2: What type of paint is best for popcorn ceilings?
Flat or matte paint is generally recommended for popcorn ceilings, as it helps to hide the texture and create a smooth appearance.
Question 3: How many coats of paint are needed?
For optimal coverage and a professional finish, apply multiple thin coats of paint, allowing each coat to dry completely before applying the next.
Question 4: Is it necessary to prime a popcorn ceiling before painting?
Yes, priming the ceiling helps to seal the surface and improve paint adhesion, especially if the popcorn ceiling is old or has been painted multiple times.
Question 5: Can I use a paint sprayer to paint a popcorn ceiling?
Yes, a paint sprayer can be an efficient tool for painting popcorn ceilings, but it is important to use a sprayer specifically designed for popcorn ceilings and to adjust the settings appropriately.
Question 6: How long does it take for a popcorn ceiling to dry after painting?
Drying time varies depending on factors such as temperature, humidity, and the type of paint used. Allow ample time for the ceiling to dry completely before using the room or touching the painted surface.
Summary:
Painting a popcorn ceiling requires careful preparation and the right tools and materials. By addressing common questions and following best practices, you can achieve a successful and visually appealing painted popcorn ceiling that will enhance your home's interior.
Transition: Learn more about painting popcorn ceilings by exploring our comprehensive guide, which provides detailed instructions and helpful tips to ensure a flawless finish.
Tips for Painting Popcorn Ceilings
Transforming a popcorn ceiling into a smooth, modern surface requires careful preparation and execution. Here are some valuable tips to ensure a successful popcorn ceiling painting project:
Tip 1: Clean the Ceiling Thoroughly: Before painting, remove dust and debris from the popcorn ceiling using a soft brush attachment on a vacuum cleaner. For stubborn dirt or stains, gently wipe the ceiling with a damp sponge or cloth.
Tip 2: Repair Imperfections: Inspect the popcorn ceiling for cracks or holes and repair them using a spackling paste or joint compound. Allow the repairs to dry completely and sand them smooth to match the surrounding surface.
Tip 3: Choose the Right Paint: Select a flat or matte paint specifically designed for popcorn ceilings. These paints are formulated to minimize the appearance of the popcorn texture and create a smooth finish.
Tip 4: Use a Paint Sprayer: For efficient and even application, consider using a paint sprayer specifically designed for popcorn ceilings. Adjust the sprayer settings according to the manufacturer's instructions.
Tip 5: Apply Multiple Thin Coats: Avoid applying thick coats of paint, as this can lead to drips and an uneven finish. Instead, apply multiple thin coats, allowing each coat to dry completely before applying the next.
Tip 6: Maintain Proper Ventilation: Ensure adequate ventilation during painting by opening windows or using fans. This helps to dissipate paint fumes and prevents them from accumulating in the room.
Tip 7: Allow Ample Drying Time: After painting, allow the ceiling to dry completely before using the room or touching the painted surface. Drying time varies depending on factors such as temperature and humidity.
Summary:
By following these tips, you can effectively paint a popcorn ceiling, achieving a smooth and professional-looking finish. Remember to prepare the surface properly, choose the right paint and tools, and allow sufficient drying time. With careful execution, you can transform your popcorn ceiling into a modern and visually appealing element of your home's interior.
Transition: Explore our comprehensive guide on painting popcorn ceilings for more detailed instructions and troubleshooting tips.
Conclusion
Painting popcorn ceilings requires a meticulous approach, proper preparation, and the right techniques to achieve a smooth, professional-looking finish. By understanding the unique challenges and following best practices outlined in this comprehensive guide, you can successfully transform your popcorn ceiling into a modern and visually appealing element of your home's interior.
Remember, careful surface preparation, including cleaning and repairing imperfections, is essential for a durable paint job. Choosing the right paint type, such as flat or matte paint specifically designed for popcorn ceilings, ensures optimal coverage and minimizes the appearance of the texture. Applying multiple thin coats with a paint sprayer or brush allows for an even and consistent finish.
Allowing ample drying time between coats and after the final coat is crucial for the paint to adhere properly and achieve maximum durability. By following these guidelines and paying attention to detail, you can confidently tackle a popcorn ceiling painting project and enhance the aesthetic appeal of your home.
/PaintingPopcornCeiling-de586720c664484ba51e4cf364c45500.jpg)