Unveiling The Secrets Of Popcorn Ceiling Transformation
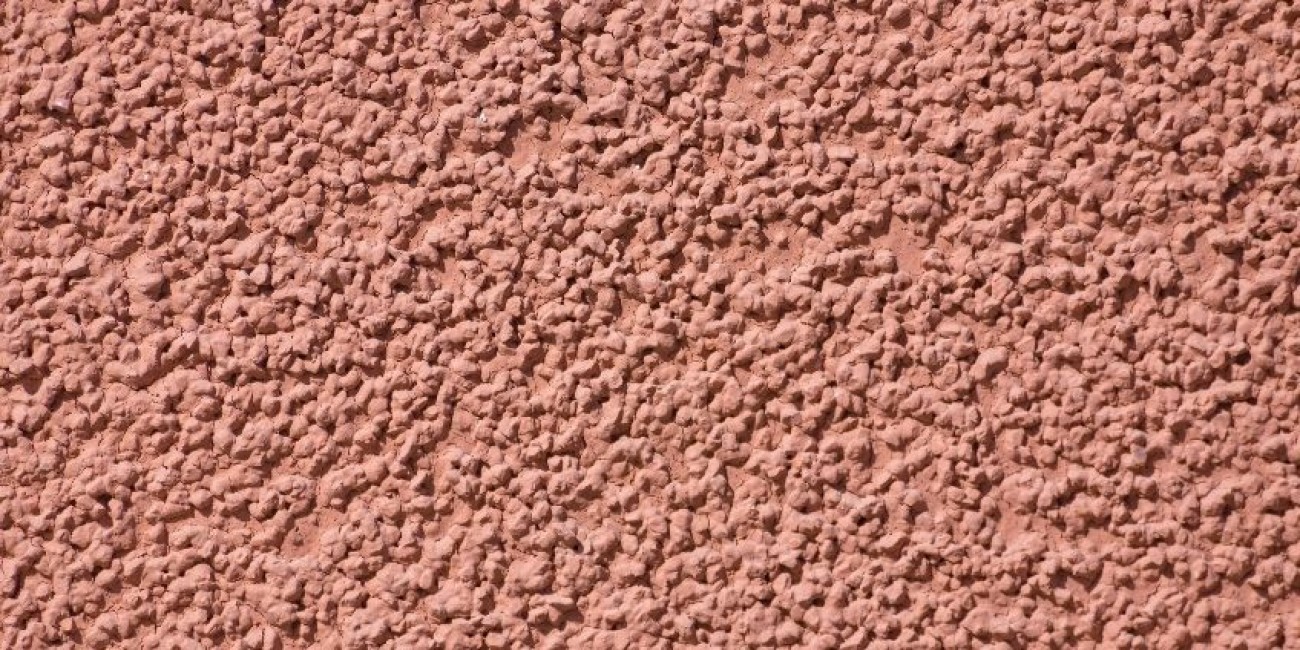
Painting popcorn ceilings requires specific techniques and materials to achieve a smooth and professional-looking finish. Popcorn ceilings, also known as acoustic ceilings, are textured ceilings with a bumpy surface that can trap dust and cobwebs. Painting these ceilings can improve their appearance, brighten up a room, and make them easier to clean.
Before painting a popcorn ceiling, it's crucial to clean it thoroughly to remove any dirt or debris. Using a vacuum cleaner with a soft brush attachment or a damp cloth, gently remove any loose particles. Next, apply a coat of primer specifically designed for popcorn ceilings. This primer helps seal the surface and prevents the paint from absorbing into the popcorn texture, making it easier to achieve an even finish.
When choosing paint for a popcorn ceiling, opt for a flat or matte finish. These finishes minimize the appearance of imperfections and create a uniform look. Avoid using glossy or semi-gloss paints, as they can accentuate the texture and make the ceiling look uneven. A sprayer is the most efficient tool for painting popcorn ceilings, ensuring even coverage and minimizing the risk of drips or splatters. Hold the sprayer perpendicular to the ceiling and maintain a consistent distance while applying thin, even coats.
How to Paint Popcorn Ceilings
Painting popcorn ceilings requires careful preparation, the right tools, and specific techniques to achieve a professional-looking finish. Here are 10 key aspects to consider:
- Surface Preparation: Clean the ceiling thoroughly to remove dirt and debris.
- Primer: Apply a primer specifically designed for popcorn ceilings to seal the surface and promote paint adhesion.
- Paint Choice: Opt for a flat or matte finish paint to minimize the appearance of imperfections.
- Sprayer: Use a sprayer for even coverage and to minimize drips and splatters.
- Thin Coats: Apply thin, even coats of paint to avoid overloading the popcorn texture.
- Multiple Coats: Apply multiple coats of paint, allowing each coat to dry completely before applying the next.
- Lighting: Ensure adequate lighting to see the ceiling clearly while painting.
- Ventilation: Keep the room well-ventilated during and after painting.
- Safety Precautions: Wear a mask and eye protection when painting.
- Patience: Allow ample time for the painting process, including drying time.
By following these key aspects, you can achieve a smooth and professional-looking finish when painting popcorn ceilings. Remember to take your time, use the right tools and materials, and follow the instructions carefully for best results.
Surface Preparation
Surface preparation is a crucial step in painting popcorn ceilings to ensure a smooth and professional-looking finish. Dirt and debris can interfere with paint adhesion, leading to peeling, flaking, or an uneven appearance.
- Improved Paint Adhesion: Cleaning the ceiling removes dirt and dust particles that can create a barrier between the paint and the popcorn texture, ensuring a strong bond and preventing premature peeling.
- Even Finish: Removing debris ensures that the paint is applied evenly over the popcorn texture, minimizing the risk of streaks or patchy areas that can detract from the overall appearance of the ceiling.
- Reduced Texture Visibility: A clean surface allows the paint to fill in the crevices of the popcorn texture, creating a smoother and less pronounced finish. This is especially beneficial when using lighter paint colors, as it helps to minimize the visibility of the popcorn texture.
- Enhanced Durability: Removing dirt and debris helps to prevent the accumulation of dust and cobwebs over time, which can contribute to the deterioration of the paint finish. A clean surface promotes better paint adhesion and longevity.
By thoroughly cleaning the ceiling before painting, you lay the foundation for a successful painting project that will result in a durable, aesthetically pleasing finish. Neglecting this step can compromise the overall quality of the paint job and lead to costly repairs or touch-ups in the future.
Primer
Applying a primer specifically designed for popcorn ceilings is a crucial step in the painting process, serving as a foundation for a successful and durable paint job. Popcorn ceilings, characterized by their textured surface, pose unique challenges that require specialized primers to ensure optimal paint adhesion and a smooth finish.
Regular primers may not adequately penetrate the crevices and peaks of popcorn texture, resulting in poor adhesion and subsequent peeling or flaking of paint. Popcorn ceiling primers are formulated with specific resins and binders that deeply penetrate the texture, creating a strong bond between the paint and the popcorn surface. This enhanced adhesion prevents premature paint failure and ensures a long-lasting finish.
In addition to promoting paint adhesion, popcorn ceiling primers also seal the surface, preventing the paint from absorbing into the popcorn texture. This helps to create a more uniform and even finish, minimizing the visibility of the popcorn texture and reducing the amount of paint required. By sealing the surface, the primer also helps to prevent the accumulation of dirt and dust, which can degrade the paint finish over time.
Using a primer specifically designed for popcorn ceilings is essential for achieving a professional-looking and durable paint job. By providing a strong bond between the paint and the popcorn texture and sealing the surface, popcorn ceiling primers ensure a smooth, even finish that will withstand the test of time.
Paint Choice
In the context of painting popcorn ceilings, selecting the appropriate paint finish is critical for achieving a visually appealing and durable result. Flat or matte finish paints are highly recommended for popcorn ceilings due to their ability to minimize the appearance of imperfections and create a smooth, uniform surface.
- Reduced Texture Visibility: Flat and matte finishes have low sheen levels, which means they do not reflect light as much as glossy or semi-gloss finishes. This reduces the visibility of the popcorn texture, creating a more seamless and even appearance.
- Concealment of Surface Flaws: Popcorn ceilings often have minor surface imperfections, such as small bumps or depressions. Flat and matte finishes help to conceal these imperfections by minimizing the contrast between light and dark areas, resulting in a more visually pleasing surface.
- Error Forgiveness: Flat and matte finishes are more forgiving of application errors, such as brush strokes or roller marks. These finishes tend to blend imperfections more effectively, making them ideal for DIY painters or those with less experience.
- Reduced Glare: Flat and matte finishes have minimal light reflectivity, which reduces glare and creates a more comfortable and inviting atmosphere in the room. This is particularly beneficial in rooms with abundant natural or artificial light.
By opting for a flat or matte finish paint, painters can minimize the appearance of imperfections, conceal surface flaws, and create a smooth, visually appealing popcorn ceiling. These finishes are especially well-suited for popcorn ceilings due to their ability to reduce texture visibility and provide a more uniform appearance.
Sprayer
When painting popcorn ceilings, using a sprayer offers significant advantages over traditional methods such as brushes or rollers. A sprayer ensures even coverage, minimizing the risk of streaks, drips, or splatters that can compromise the appearance of the ceiling.
The even distribution of paint achieved through spraying helps to create a smooth, professional-looking finish. By maintaining a consistent distance and applying thin, even coats, painters can avoid overloading the popcorn texture, which can lead to a clumpy or uneven appearance.
Sprayers also minimize the risk of drips and splatters, which can be particularly problematic with popcorn ceilings due to their textured surface. The controlled application of paint through a sprayer helps to prevent excess paint from dripping or splattering onto the floor, walls, or furniture.
Furthermore, using a sprayer can significantly reduce the time and effort required to paint a popcorn ceiling. The ability to cover large areas quickly and efficiently makes sprayers a practical choice for both DIY projects and professional painting contractors.
In summary, using a sprayer when painting popcorn ceilings is essential for achieving a smooth, even finish while minimizing drips and splatters. Its efficiency and ease of use make it an indispensable tool for both experienced painters and those tackling popcorn ceiling painting for the first time.
Thin Coats
When painting popcorn ceilings, applying thin, even coats of paint is crucial to achieving a professional-looking finish and avoiding common pitfalls. Overloading the popcorn texture with paint can lead to a clumpy, uneven appearance, obscuring the desired texture and compromising the overall aesthetic of the ceiling.
Applying thin coats allows the paint to penetrate the popcorn texture without weighing it down. This technique ensures that the texture remains visible and distinct, creating a more natural and visually appealing finish. Additionally, thin coats help to prevent drips and splatters, which can be particularly problematic with popcorn ceilings due to their uneven surface.
To achieve the best results, use a sprayer or a high-quality brush and apply light, sweeping strokes. Avoid applying excessive pressure, as this can push too much paint into the popcorn texture. Allow each coat to dry completely before applying the next to prevent runs or smudging. By following these guidelines, you can ensure a smooth, even finish that complements the unique texture of your popcorn ceiling.
Multiple Coats
Applying multiple coats of paint is a crucial step in the process of painting popcorn ceilings, as it helps to achieve a smooth, even finish and ensures the longevity of the paint job. Each coat serves a specific purpose and contributes to the overall quality of the final result.
- First Coat: The first coat acts as a primer, creating a base for subsequent coats to adhere to. It helps to seal the popcorn texture and prevents the paint from absorbing unevenly, which can lead to a blotchy appearance.
- Second Coat: The second coat provides coverage and helps to build up the color. It fills in any gaps or inconsistencies from the first coat, resulting in a more uniform surface.
- Third Coat: For optimal results, a third coat is often necessary, especially if the desired color is light or if the popcorn texture is particularly deep. This additional coat enhances the depth of color and ensures complete coverage, minimizing the visibility of the popcorn texture.
- Drying Time: Allowing each coat to dry completely before applying the next is essential for achieving a durable and professional-looking finish. Wet paint can cause subsequent coats to peel or crack, compromising the overall integrity of the paint job.
By following these guidelines and applying multiple coats of paint with proper drying time, you can ensure a smooth, even, and long-lasting finish on your popcorn ceiling, enhancing the aesthetic appeal of your space.
Lighting
Proper lighting plays a crucial role in achieving a high-quality finish when painting popcorn ceilings. Good lighting helps to illuminate the surface evenly, allowing the painter to see any imperfections or areas that require additional attention. Inadequate lighting can lead to missed spots, uneven paint application, and a less than satisfactory final result.
- Improved Visibility: Adequate lighting helps to enhance the visibility of the popcorn texture, making it easier to identify and address any inconsistencies in the paint application. This ensures a more uniform and professional-looking finish.
- Reduced Errors: Good lighting minimizes the risk of errors and mistakes by allowing the painter to clearly see the areas being painted. This helps to prevent missed spots, uneven paint distribution, and the need for touch-ups or repainting.
- Enhanced Precision: Adequate lighting enables greater precision during the painting process, as the painter can more easily control the application of paint and achieve clean lines and edges. This is especially important when painting around fixtures, moldings, or other architectural features.
- Consistency: Proper lighting helps to ensure consistency in the paint application, as the painter can better judge the thickness and coverage of the paint. This results in a more uniform and visually appealing finish across the entire popcorn ceiling.
In conclusion, ensuring adequate lighting while painting popcorn ceilings is essential for achieving a high-quality and professional-looking result. By providing good visibility, reducing errors, enhancing precision, and promoting consistency, proper lighting empowers painters to create a beautifully finished popcorn ceiling that adds character and style to any space.
Ventilation
Adequate ventilation is a crucial aspect of painting popcorn ceilings, ensuring the safety and well-being of the painter and contributing to the quality of the finished product.
- Odor Control: Paint fumes, particularly those from oil-based paints, can be strong and potentially harmful if inhaled. Proper ventilation helps to dissipate these fumes, reducing the risk of respiratory irritation, headaches, or other health issues.
- Drying Time: Good ventilation promotes faster drying of the paint, allowing the ceiling to be used sooner and reducing the risk of dust or debris sticking to the wet paint. Proper airflow helps to circulate the air and remove moisture, expediting the drying process.
- Paint Adhesion: Adequate ventilation helps to ensure proper paint adhesion to the popcorn ceiling. Fresh air flow prevents the accumulation of moisture on the surface, which can interfere with the bonding process and lead to peeling or flaking of the paint.
- Safety Precautions: In addition to promoting the drying process and improving paint adhesion, proper ventilation also serves as a safety precaution. It helps to prevent the buildup of flammable vapors, reducing the risk of fire hazards.
In summary, maintaining adequate ventilation during and after painting popcorn ceilings is essential for health, safety, and the quality of the final result. By ensuring proper airflow, painters can create a healthier and safer painting environment, promote faster drying times, enhance paint adhesion, and reduce the risk of accidents.
Safety Precautions
When painting popcorn ceilings, prioritizing safety is paramount. Wearing a mask and eye protection safeguards the painter from potential health hazards associated with paint fumes and debris.
- Respiratory Protection: Paint fumes, particularly from oil-based paints, contain volatile organic compounds (VOCs) that can irritate the respiratory system. A mask effectively filters these fumes, reducing the risk of inhalation and associated health issues such as asthma, allergies, and respiratory distress.
- Eye Protection: Paint droplets and dust particles can easily enter the eyes during painting, causing irritation, redness, or even more severe injuries. Eye protection, such as safety goggles or glasses, shields the eyes from these hazards, preventing potential eye damage.
- Skin Protection: In addition to respiratory and eye protection, wearing gloves and protective clothing can prevent skin contact with paint and its chemical components. This is especially important for individuals with sensitive skin or allergies to certain paint ingredients.
- Overall Safety: Adhering to safety precautions like wearing a mask and eye protection contributes to the overall safety of the painting process. By minimizing the risk of accidents and health hazards, painters can work with greater peace of mind and focus on achieving a high-quality finish.
In conclusion, wearing a mask and eye protection when painting popcorn ceilings is a crucial safety measure that safeguards the painter's health and well-being. Prioritizing safety allows for a more comfortable and productive painting experience, resulting in a beautifully finished popcorn ceiling that enhances the aesthetics of any space.
Patience
Painting popcorn ceilings requires meticulous attention to detail and ample time for each step of the process, including drying time. Patience is a crucial component of achieving a high-quality, long-lasting finish.
Neglecting drying time can lead to several problems. Applying subsequent coats of paint before the previous coat has fully dried can cause the paint to peel, crack, or bubble. Additionally, walking on or touching the ceiling too soon can leave footprints or marks, ruining the smooth finish.
Allowing sufficient drying time between coats ensures that each layer adheres properly to the surface. This creates a strong bond that prevents the paint from peeling or chipping in the future. Furthermore, allowing the final coat to dry completely before using the room minimizes the risk of dust or debris sticking to the fresh paint, compromising its appearance and durability.
In summary, patience is essential when painting popcorn ceilings. Allowing ample time for the painting process, including drying time, is crucial for achieving a beautiful, durable finish that will last for years to come.
Frequently Asked Questions on Painting Popcorn Ceilings
Painting popcorn ceilings can present unique challenges, and many questions arise during the process. Here are answers to some of the most common inquiries, providing valuable guidance for achieving a successful outcome.
Question 1: Is it necessary to prime popcorn ceilings before painting?
Answer: Yes, applying a primer specifically designed for popcorn ceilings is crucial. It seals the surface, preventing paint from absorbing unevenly and highlighting the popcorn texture. Primer also enhances paint adhesion, ensuring a durable and long-lasting finish.
Question 2: What type of paint should I use for popcorn ceilings?
Answer: Flat or matte finish paints are highly recommended. They minimize the appearance of imperfections and create a smooth, uniform surface. Avoid glossy or semi-gloss paints, as they can accentuate the popcorn texture and make the ceiling look uneven.
Question 3: How many coats of paint are needed?
Answer: Typically, two to three coats are sufficient to achieve good coverage and a smooth finish. Allow each coat to dry completely before applying the next to prevent peeling or cracking.
Question 4: Should I use a brush or a sprayer to paint popcorn ceilings?
Answer: A sprayer is the preferred tool for painting popcorn ceilings. It ensures even coverage and minimizes the risk of drips or splatters. If using a brush, choose one with soft bristles to avoid damaging the popcorn texture.
Question 5: How long does it take for popcorn ceilings to dry?
Answer: Drying time varies depending on factors such as temperature, humidity, and the type of paint used. Allow at least 24 hours for each coat to dry completely before applying the next or using the room.
Question 6: Can I paint over popcorn ceilings with a different texture?
Answer: It is not recommended to paint over popcorn ceilings with a different texture. The new texture may not adhere properly and could result in an uneven or bumpy finish. If a different texture is desired, it is best to remove the existing popcorn ceiling and install new drywall.
Summary: Painting popcorn ceilings requires careful preparation, the right tools and materials, and meticulous attention to detail. By following the recommended techniques and addressing common concerns, you can achieve a smooth, durable, and aesthetically pleasing finish that enhances the appearance of your space.
Transition to the next article section: For further guidance and tips on painting popcorn ceilings, refer to the comprehensive article provided.
Tips for Painting Popcorn Ceilings
Painting popcorn ceilings requires specific techniques to achieve a smooth and professional-looking finish. Here are some valuable tips to guide you through the process:
Tip 1: Prepare the Surface Thoroughly
Before painting, clean the ceiling to remove dust and debris. Use a vacuum cleaner with a soft brush attachment or a damp cloth to gently remove any loose particles. Applying primer specifically designed for popcorn ceilings is crucial to seal the surface and promote paint adhesion.
Tip 2: Choose the Right Paint and Tools
Opt for flat or matte finish paints to minimize imperfections. Avoid using glossy or semi-gloss paints, as they can accentuate the popcorn texture. A sprayer is the most efficient tool for painting popcorn ceilings, ensuring even coverage and minimizing drips or splatters.
Tip 3: Apply Thin Coats
Avoid overloading the popcorn texture with paint by applying thin, even coats. Allow each coat to dry completely before applying the next to prevent drips, runs, or a clumpy appearance.
Tip 4: Use Adequate Lighting and Ventilation
Ensure proper lighting to see the ceiling clearly while painting. Adequate ventilation helps dissipate paint fumes and promotes faster drying time. Keep the room well-ventilated during and after painting to maintain a safe and healthy environment.
Tip 5: Be Patient and Allow Drying Time
Allow ample time for each coat of paint to dry completely before applying the next or using the room. Drying time varies depending on factors such as temperature, humidity, and the type of paint used. Patience is key to achieving a durable and visually appealing finish.
Summary: By following these tips and adhering to proper painting techniques, you can successfully paint your popcorn ceiling, resulting in a smooth, professional-looking finish that enhances the aesthetics of your space.
Conclusion
Painting popcorn ceilings requires specific techniques and careful preparation to achieve a smooth and professional-looking finish. This article has explored the essential aspects of painting popcorn ceilings, emphasizing the importance of surface preparation, primer application, paint selection, and proper painting techniques.
By following the guidelines outlined in this article, homeowners and painters can confidently undertake popcorn ceiling painting projects. The key to success lies in meticulous attention to detail, patience, and the use of appropriate tools and materials. A well-painted popcorn ceiling can transform a room, enhancing its aesthetics and creating a more inviting atmosphere.
/PaintingPopcornCeiling-de586720c664484ba51e4cf364c45500.jpg)